How to Use a Skiver

Imagine skiving is that evil predator seal and I am poor hapless Buster Blooth. And imagine the sheer horror of attempting to escape an overbearing mother, only to be apprehended by this hand eating seal. That feeling of dread, is the dread that fills my heart when I know I have to skive something. Sure it's a little dramatic, but skiving and I really did start off on the wrong foot.

The first time I attempted to skive anything was on my second project, which was a purse I made for my wife. I've referenced this purse before in a post about rivets, so I won't say much about it, other than I made it with the first piece of leather I ever bought, which was a really rough 8oz piece of veg tan. Really stiff 8oz leather may be great for, say a belt, but horrible for a purse. So instead of buying an entire new piece of leather I thought I’d be clever and skive the entire thing.

I was not clever.

What resulted was about six to eight hours of extreme frustration while I tried to skive all of this 8oz leather down to about 5oz. And I tried really hard to keep it all smooth, but it ended up extremely pitted. To make matters worse, I was using a super skiver (which I didn’t even really know what that was at the time) and started to rush towards the end as I got more and more impatient. That, of course, only resulted in me cutting a hole completely through a few pieces of leather and having to start all over again.

Long story short, it was a horrible mess, and I still have some angst towards skiving.

I had no idea what I was doing. Super skivers aren’t meant to be used that way. Normal skivers aren’t supposed to be used that way either. What I really needed was a splitter.

So, here’s some things I’ve learned along the way about skivers that I wish I would’ve know prior to making that purse.


Skiver vs. SUPER Skiver vs. Splitter:

It helps to think of these three tools as different versions of one another. They all do the same thing, but to a different capacity.

Skiver-01.png

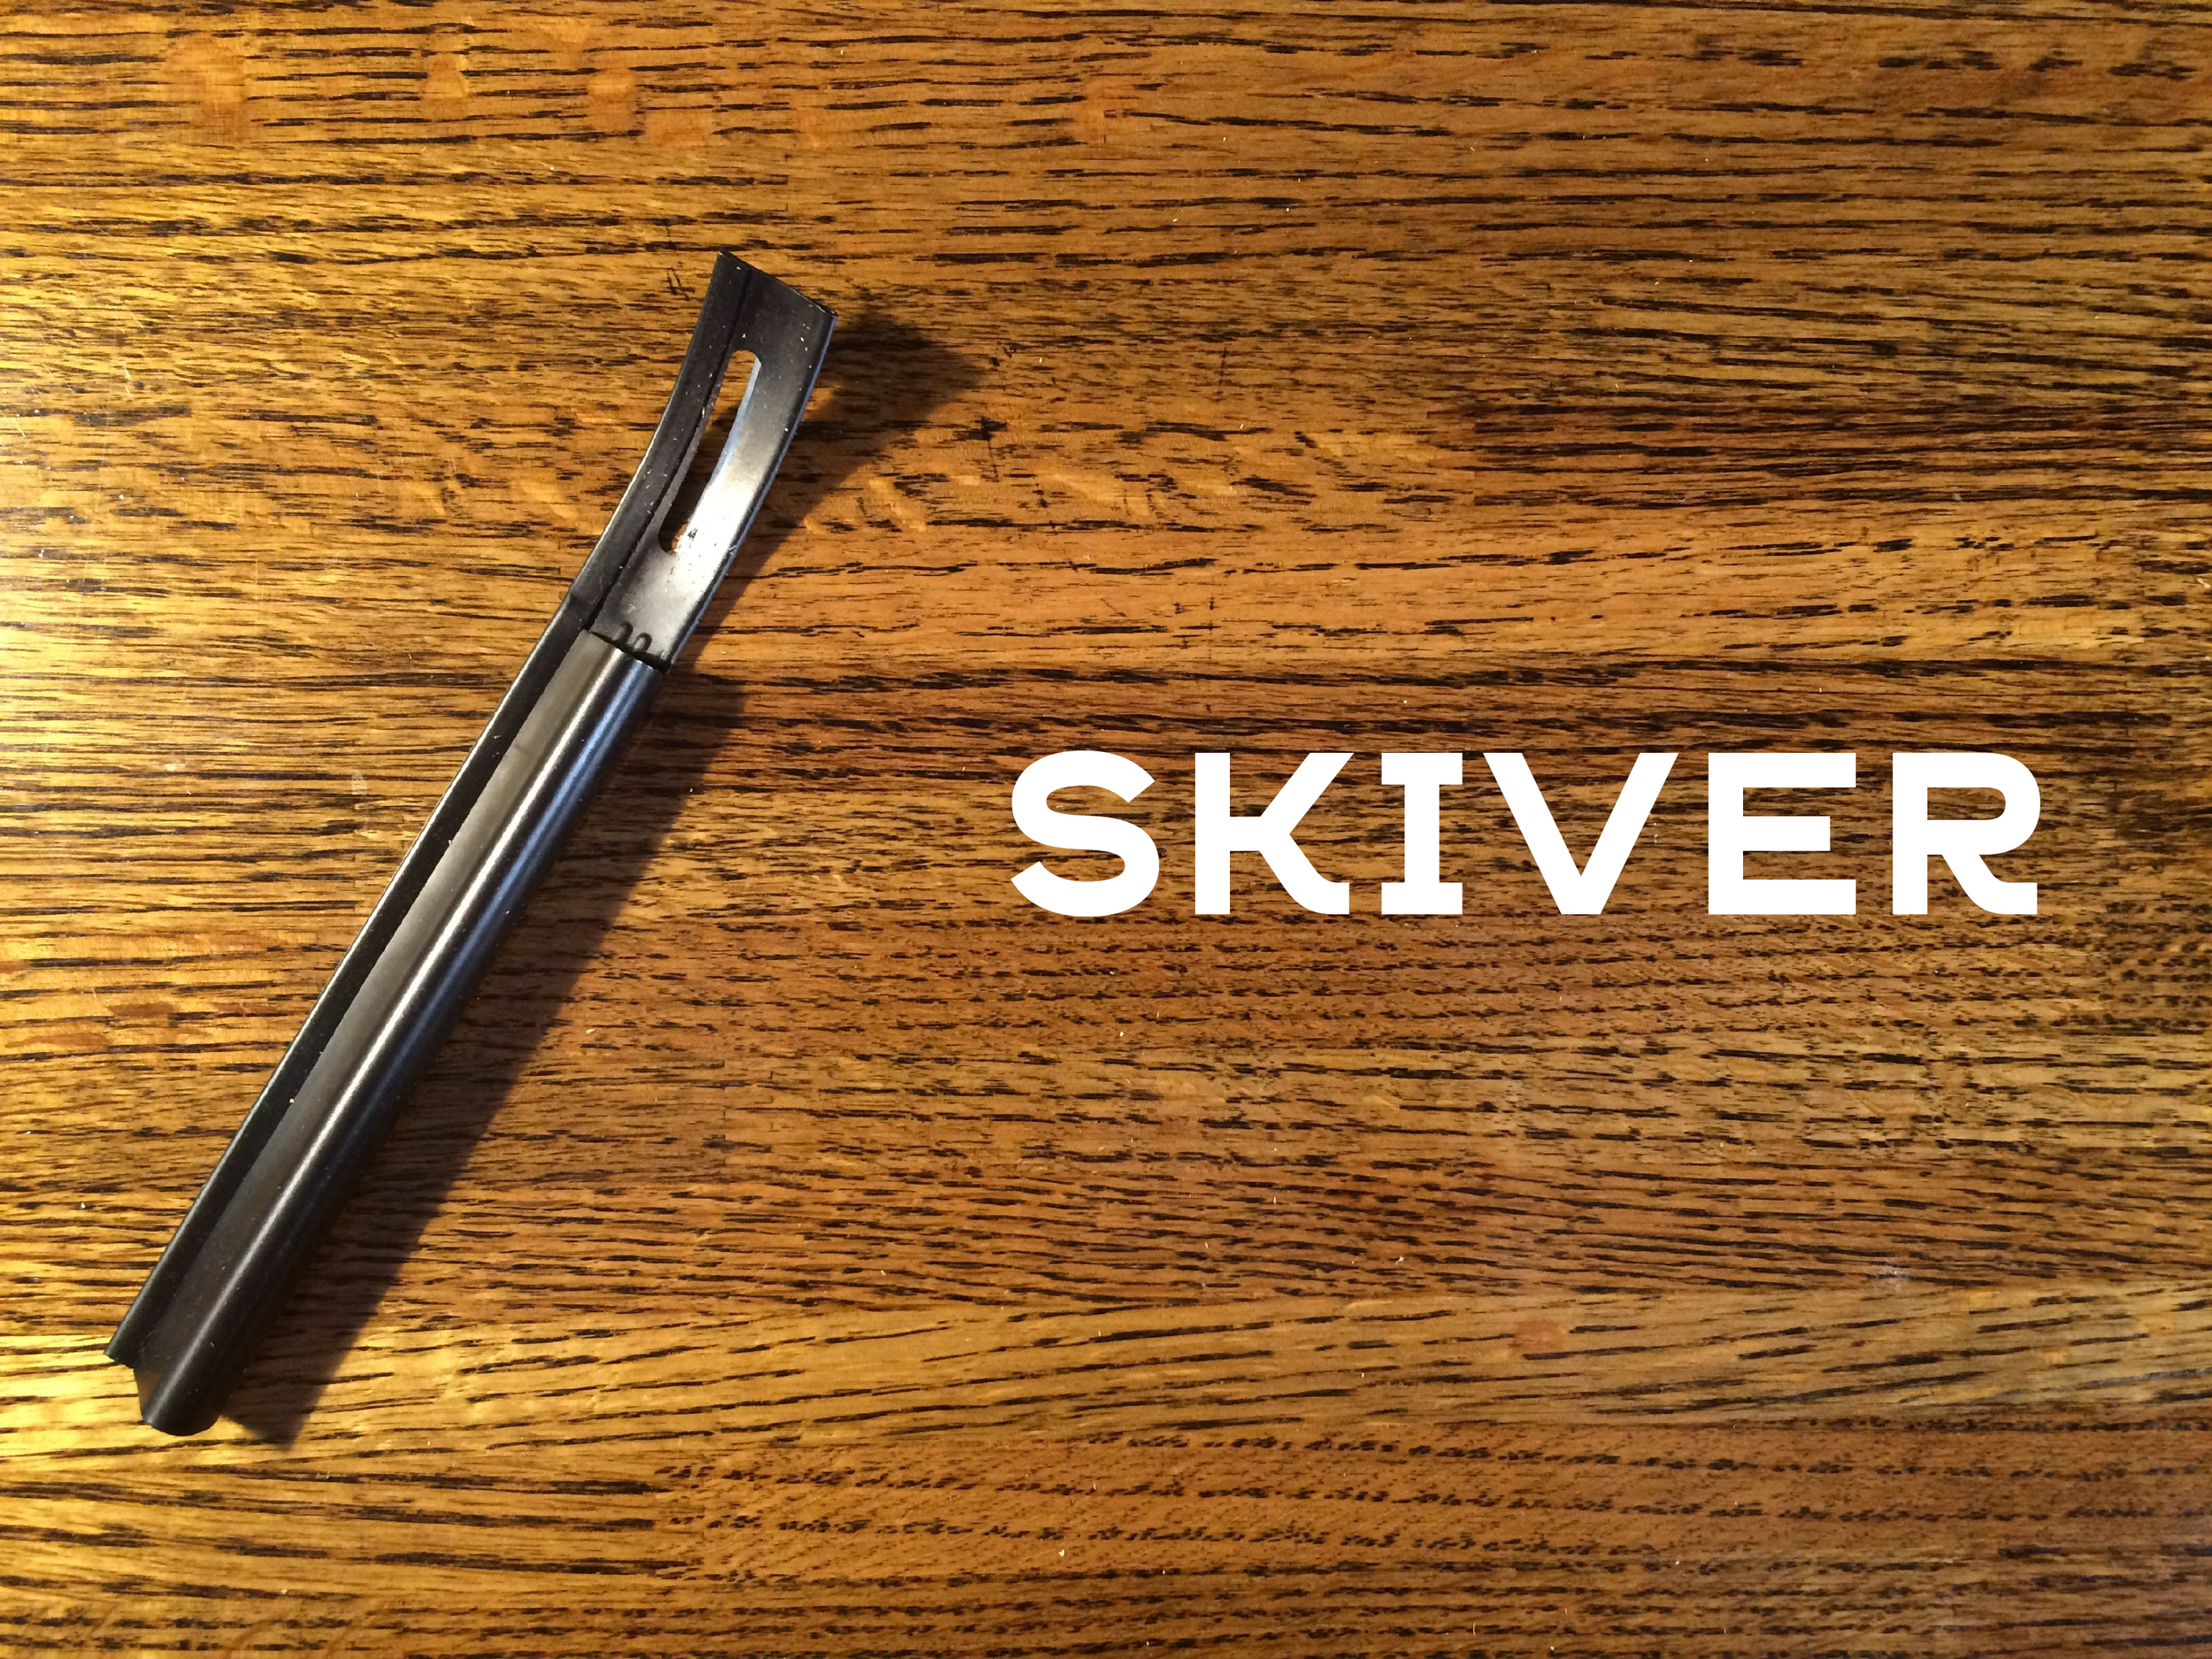
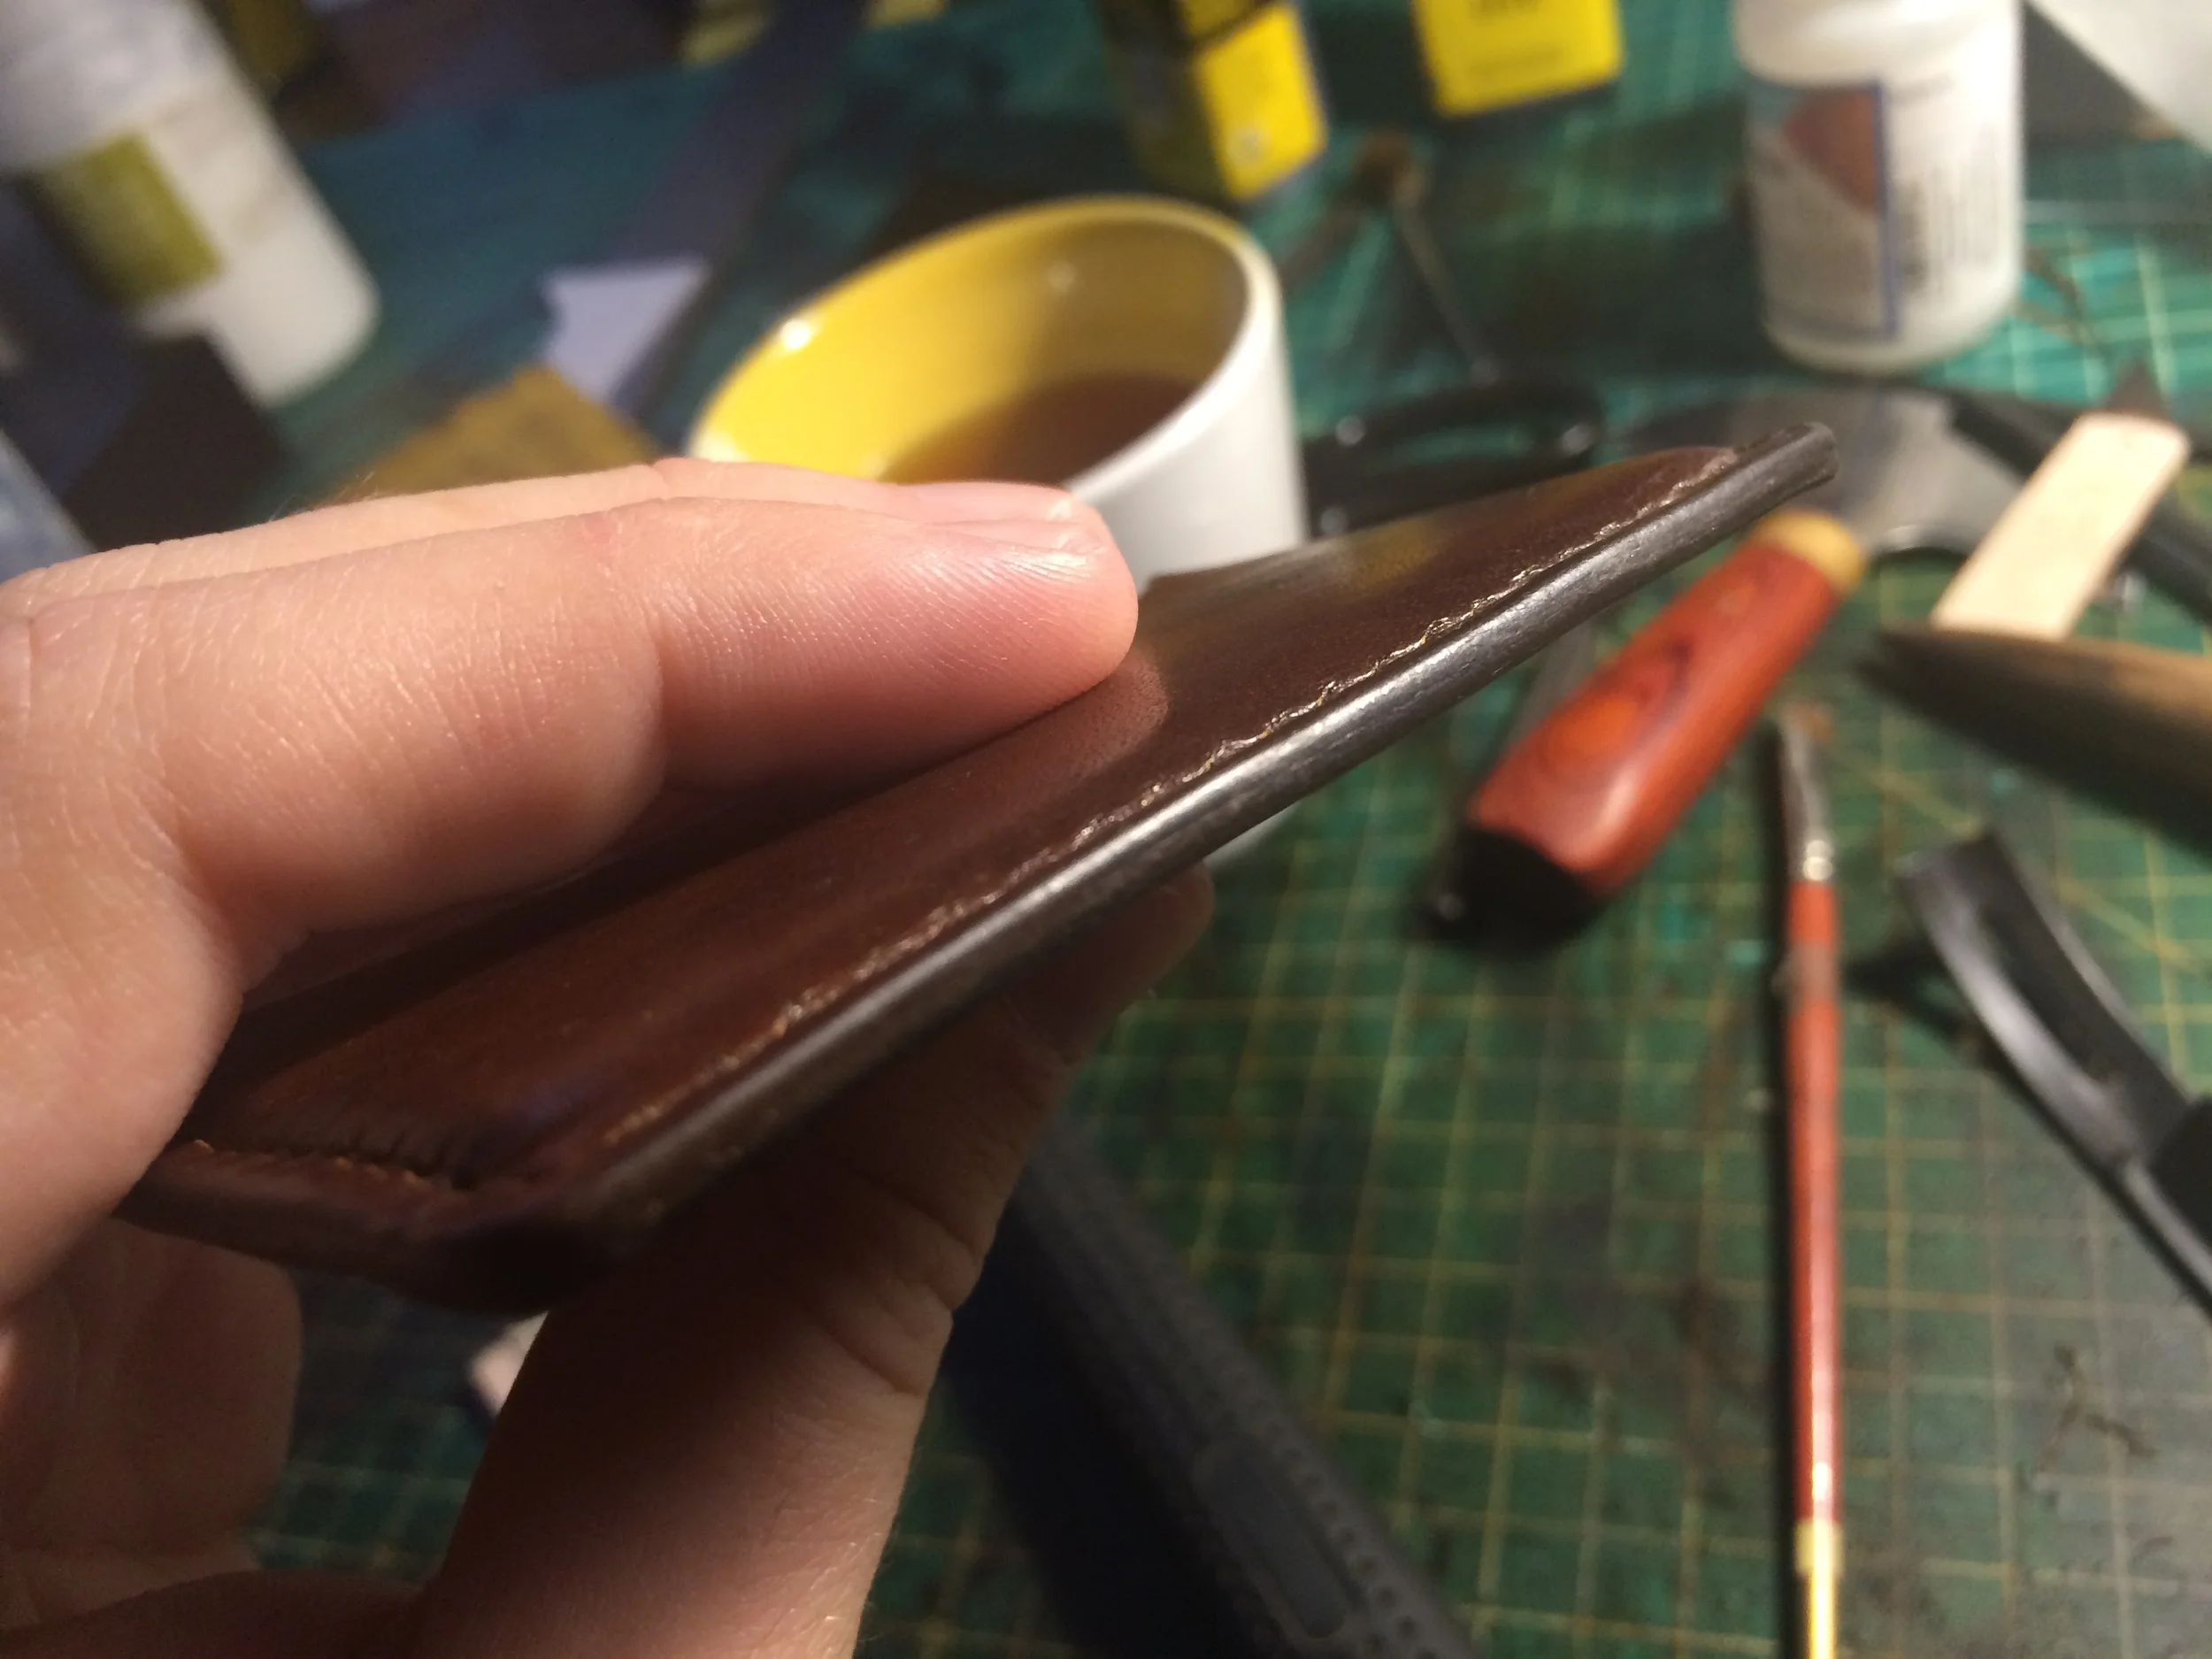
This is the smallest, and it's for reducing the thickness of leather in small areas. It’s most common function is skiving edges, which will make an edge less bulky. This is normally desirable if you have two pieces of leather stacked on top of each other. Think of a wallet that can hold multiple cards. Each card is held in place by a different piece of leather, yet the edge is all a uniform thickness and not extremely bulky. This was achieved by reducing the edge's thickness by means of a skiver.

This pretty much works like a skiver, just more so. The depth and width of your cuts are amplified… and so are your mistakes. I actually find the super skiver to be a lot less of a controlled process than the normal skiver. I would not recommend using a super skiver on leather that wasn’t at least 8oz thick. It would cut all the way through on thin leathers like 3oz, and even on something like 6oz leather, I think it’s too easy to make mistakes. Where the super skivers really shines, however, is with belts. Most people, myself included, skive the ends of their belts that fold over, around the buckle. This prevents the belt from being to bulky. It’s really nice to be able to skive that quickly with the super skiver. It usually only takes two or three passes with a super skiver as opposed to the eight to ten it would probably take with a normal skiver.


Splitter:

If we are sticking to this super thing, its basically like a super super skiver… but it does work a bit differently. The blades of skivers and super skivers are bowed in the middle, which means your cut is going to be made across the middle of your blade. A splitter blade is flat and cuts across the entire blade. Splitters reduce the thickness of the entire piece of leather, instead of just parts of it. This is what I had hoped to do with the purse: take all the 8oz leather and make it 5oz. I don’t currently own one of these because they will cost you a bit of money, but it would definitely be nice to own a splitter one day.


Tips for a Skiver:

1. Using a skiver doesn’t take much force, so you can hold the leather still as you skive it with just a few fingers. This is great because it lets you skive using both hands, which gives you a lot more control.

2. Additionally, skivers can get kind of stuck in the leather as you use it. Usually this happens when you accidentally bury it too deep in the leather. There are two things you can do when this happens. Take the skiver out and skive the other direction. Or continue to pull, but pull up as you do it. If you decide to continue the skive and pull up, which is what I prefer, having both hands to gently rock it back and for while tilting it upwards really helps to smooth out the mistake.

A Skived Edge

3. When skiving an edge, always have your skiver at an angle. Rest the back end of the skiver on the table and angle the blade, so that the middle of the blade is on the edge of the leather. Resting the back part of the skiver on the table as you skive will help you maintain a consistent angle.


Tips When Using a Super Skiver:

Take these tips with a grain of salt because, as I have already mentioned, my skill with a super skiver is not… super.

1. I’ve noticed that the super skiver has a natural tendency to want to bury itself in the leather. I will pull down into the leather as I attempt to sink the skiver to the depth that I need it, but then pull the skiver up and towards me about 15% to fight against it sinking further.

2. To get a flat surface, know that you are going to have to overlap your cuts. As mentioned earlier the blade is curved, with the lowest point in the middle. If you are trying to skive more than just an edge you will have to over lap your cuts about 1/3 on either side to get a nice flat surface.

3. Clean out your blade. Skivers in general, but especially super skivers, tend to get bits of leather stuck between the blade and the tool. This makes the cuts much worse for two reasons. First they won’t be as even or smooth. And second, it pushes the blade further away from the tool making your cuts deeper than normal.

4. Finally make sure to sharpen and replace your blades. If I'm being thrifty, I will sometimes take the blade out and strop it. This keeps it sharp for awhile, but if I am still having problems after stropping it, I just replace the blade. The replacement blades are much cheaper than the leather you’re about to make a mistake on, so don’t be afraid to throw them out and replace them. Do be careful when replacing them though. Sometimes the replacement blades aren’t consistently sharp. If this is the case I’ll throw that one out until I find a good one.


All in all, I really prefer the normal skiver to the super skiver. I find that it can accomplish the same thing, in about the same amount of time, with a lot more control, and that control is really what is most important to me. 

I’m really hoping these tips keep you from being traumatized like I have been. Let me know if you have a skiving tip I left out, or an Arrested Development gif you can somehow relate to leatherworking. Here’s to a brighter skiving future.

Cutting Corners

This title is literal.

Corners are some of the most difficult cuts you’ll make in leatherworking, both rounded and sharp. One problem that I had early on is that I would cut my corners at the same speed and with the same presence of mind that I gave my straight cuts. The bad part is, I needed to be giving my straight cuts more than I was giving them... so you can imagine how bad my corners looked. I’ve since slowed down, and have really given some thought to how I’m making my cuts. Hopefully checking out a few of the methods and tricks people use to cut corners, will help you make that transition from rushing to giving all your details attention.


Method One: Cutting a Sharp Corner

This is the easiest corner to cut. And you could just use a ruler and make the cut with a rotary cutter. Your corner will look good doing this, but you’ll inevitably cut past where the corner ends and into the rest of your leather. When you’re using inexpensive leathers this may not seem like a big deal, but it’s better to learn how to do this prior to switching to more expensive leathers than while you’re making the transition. To make sure your cut ends right at the corner, set the point of your blade (either head/round knife or x-acto knife) in the corner. Then, lay your ruler along one of the lines and make your cut. Once you’ve completed that cut, go back and again set the point of your blade on the corner. Now set down your ruler along the other line and make that cut.

First mark out your corner (click to enlarge).

Set the point of your blade in the corner (click to enlarge).

Line up your ruler and make the cut (click to enlarge).


Method Two: Washer CorneRS

Washers are cheap, available in many sizes, and are (obviously) round. All this makes them great guides for cutting rounded corners. My one suggestion for this is not to use an expensive knife while doing it, and instead use something disposable, like an x-acto, to make the cut. This way you avoid nicking and damaging good knives. To do this, I usually cut out the piece of leather using the previous method, leaving the corner sharp. Then, I set the wash in the corner. If you notice in the picture, I leave a very small space between the edge and the washer to leave room for the blade. From my experience, if you put the washer right on the edge, the cut will look a little jagged where the curve meets the straight line. Once you’ve set the washer in the correct spot, press down and make your cut, pulling into the washer to keep the blade from drifting. I really love the results I get using this method. As you can see from the picture, the curve turns out very smooth.

I usually cut out a piece with a 90 degree corner. Then I place the washer. Notice the small gap (click to enlarge).

Press down and make the cut (click to enlarge).

This is the result (click to enlarge).


Method Three: Free Hand

This is, with out a doubt, the hardest way to do it, but it’s not a bad skill to develop. To do this, place your left hand (assuming your cutting with the right) inside the curve. Place your blade at the end of the curve closest to you. Then, while slowly pushing your blade forward, rotate your left hand to slowly move the leather. The trick is making sure both motions are smooth and uninterrupted. It’s definitely hard to do and I’m still on the early stages of learning this one.

Mark out your curve (click to enlarge).

Slowly push the blade forward while rotating the leather with your left hand (click to enlarge).

Not the best corner, but it's getting there (click to enlarge).

Method Four: Curve by 1000 Cuts

The last, and most popular way is to take a blade (usually I see rotary cutters, and I do think they work best for this method) and make many straight cuts along the curve. The trick to this is to make sure not to cut too much at once. It’s a lot of little straight cuts that will make a curve, not three or four. Make sure to keep your blade perpendicular to the leather, otherwise you may accidentally tilt the blade inward while making the cuts. This is a really easy mistake to make. When this happens, the top side of the leather will look good, but because you cut at an angle, the bottom will not be the same shape. If you make this mistake, you can always go back with the rotary cutter and clean it up by repeating this method.

Cut out the piece of leather and leave the corner on (click to enlarge).

Then make cuts along the curve like the ones marked here (click to enlarge).

This is how the edges turned out. A little jagged, but round. Sanding will smooth this out (click to enlarge)

Here are the three methods side by side. The left is the multiple cuts, the middle is free hand, and the right was made using the washer. For me, the washer edge turned out the best (click to enlarge).

Don’t Forget to Sand

All edges should be sanded anyway during the burnishing process, but it helps to sand right after cutting a curve. This way, when you go to glue to pieces of together, the edges will be similar and only need a little more sanding. I sand curves by pulling 150 grit sandpaper around the curve in one direction only. With a grit that low, it doesn’t take long get them smoothed out.

Slowing down and really giving attention to every detail is what makes a project great. So here’s to developing skills and thoughtfulness at the most basic levels of leatherworking.

And as always if you have another method, or questions for me, please contact me. I’ve had some great conversations with people who have reached out so far!

A Basic Guide to Burnishing

There are literally hundreds of ways to clean up the edges of your leatherworking projects. And most established leatherworkers have their own unique way to do their edges. Some spend a really long time getting a nice glossy and smooth finish, others prefer a more matte look that usually comes with using some sort of heating and edge paint, while others just keep them the way they are for a rugged look (I generally steer people away from unfinished edges, while some like the look, those edges will quickly fray). To find what you like, I really encourage you to do some google/instagram searching on different leatherworkers' shops and find a product you like. A lot of leatherworkers have posted guides on how they do their edges, and if they haven’t, most are easily accessible. The leatherworking community is a extremely helpful and generally willing to offer advice to others learning the skill, so don’t be afraid to reach out. You wouldn’t believe the countless people I’ve asked for help, and the immense help I’ve gotten while learning.

Even though everyone has their own flavor, below is a basic guide to burnishing edges.  A lot of people will add to this process and some do less than it, but doing this when your starting will keep your edges looking great and ensure you’ll be developing the skills you need to have when making your own edge formula.

Step 1: Cut Correctly

When you don’t make good, clean, and well measured cuts, your pieces won’t line up when you go to glue them together. This is common sense, but when just starting, there is a big temptation to rush it because 'cutting things out should be easy' and you’re eager to see the finished project. I get it, I’ve been there. But slow down, endure the frustration that sometimes accompanies learning something new and make good cuts. This is going to save you a lot of time and frustration later. Here’s a post that has some good tips for getting clean cuts.

Step 2: Glue

This is another thing that seems simple because you’ve been doing it since the first grade. And don’t worry, it's as simple as it seems. There are few things to be mindful of when you’re glueing though. One is to glue all the way to the edge. If you haven’t done this, your edges will start splitting apart during the burnishing process. The second is to keep in mind that the glue dries pretty fast, so don’t glue the entire project, and then put it together. Do a bit of gluing at a time, then place the pieces together, and then glue some more. Finally make sure to keep your glue straight. If you’re sloppy and over glue the item you're making (especially if it’s something like a wallet or bag than opens up) will not have the dimensions you'd planned for. If you do accidentally do this, you can rip it back apart but it’s not great on the leather. Cement glue is used for glueing leather. I use Seiwa Leathercraft Glue. 

Step 3: Cut again

At this point check your edges to make sure everything pretty much lines up. If things aren’t perfect that is okay because it will be cleaned up during the sanding process. Do make sure there isn’t an edge where one piece is noticeably longer than the other. If you find one, now is the time to take a knife and cut it back so the edges are flat.

Step 4: Bevel

If I’m going to use a stitching groover I use it before I bevel, when the edges are flat and lined up well. After I’ve done that I use a beveler. This helps to round out your edges. They won’t be perfect at this point, but it preps the leather to be rounded out by sand paper. If you don’t use a beveler before you burnish, the edges will start to fold over on themselves during the burnishing process. If you’re not sure what these two tools are or you don’t know what they do, you can read more about them here.

Step 5: Sand like a Maniac

This is what glue looks like when it needs to be sanded off. Click to enlarge photo.

Some people are pretty fanatic about how much they sand their edges, using lots of different grits to create their edges.  I use three different grits and I’ve been pretty happy with the result. When sanding make sure to only sand a short distance. This will help to keep your hand flat while sanding. As with beveling and cutting, the further your hand gets from your chest the more it starts to roll. I start with a 150 grit sand paper to shape the edges. This takes your edges from being more angular (from the beveling) to a round shape. While using this grit of sand paper there are two things you need to focus on. First the two pieces of leather that make your edge are sanded down to the same level and that they are rounded out. The second is that you sand off any access glue. You can see the glue when sanding because it will darken the color of the edges. Make sure you sand until the glue is completely gone. Any glue that is left won’t take the dye. After that I use 600 grit to get rid of any fibers that are sticking up. And finally I use 800 grit to get it nice and smooth.

Step 6: Dye

Generally I use the same dye that I used on the top side of the leather because edges naturally darken when being burnished. Applying dye to edges is a bit tricky because you only want to hit the edges and not the already dyed leather. Tandy has wool daubers that work alright, but I find it hard to control where the dye goes sometimes. Alternatively you can cut a small square piece off a sponge and clamp it with a wooden clothespin. 

Step 7: Burnish with A Wood Slicker

This is the part that is going to take some practice. Don’t worry though, you’ll feel like a champ once you get it down! Wet a short distance of your edge with a small amount of gum tragacanth. Set the edge inside the notch on your burnisher, making sure the notch you choose doesn’t pinch the leather as you are trying to burnish. Then run the burnisher briskly back and forth across the edge with out over extending your hand. Make sure to not put too much pressure on the edge itself. All you are trying to do is create heat through friction, not mash your edges. Do this until you hear a tacky sound. The sound is hard to describe, but you will know it when you hear it. Once you hear it you’ll know your edges have been burnished well. They should look glossy at this point.

Step 8: Apply Beeswax

I find this last step adds a nice shine to your edges. It doesn’t take long to do it and beeswax is really inexpensive. All you need to do is rub beeswax on all the edges and then buff it out with a small piece of canvas. At this point you've finished and your edges should look similar to the picture below.

The edge of a card holder I recently made. You can still see imperfections on the edge, but they're getting there. My desk, however, is a complete mess. 

The edge of a card holder I recently made. You can still see imperfections on the edge, but they're getting there. My desk, however, is a complete mess. 

Burnishing edges are difficult and was definitely a source of disappointment on my early projects. Finding edges that I liked and keeping those in mind as I wrestled with my crappy looking edges really helped me push through to learn the skills I needed for good looking edges. Keep being mindful of the details as you practice and learn and you'll soon have impressive edges.

As I mentioned above, I know there are a lot of ways to do edges well. If you have your own unique edge process I’d really love to check it out. Send me a link through email or drop it in the comments below.

6 Tips for Better Cuts

Cutting leather is one of those things we don’t think about often, because it seems so elementary. But here’s a few things you can be intentional about to create cleaner cuts and save time when prepping your edges for burnishing.


1. Sharpen your knives… a lot. This is one of those things I dreaded doing most, but dull knives make terrible cuts. It seemed tedious, which is sometimes is. And it seemed like it would take forever to learn, which is also true. But it will make you better and you need to get in the habit of doing it. Start small and commit to sharping your knife for 5 minutes before every leather working session. Overtime you will build a skill for it. Make sure to check out this video to ensure you’re doing it right. If you’re using a rotary cutter the blades are obviously replaceable and you can buy sharpers for them that make sharpening easy. For beginners rotary cutters are great, but don’t let the idea of sharpening by hand prevent you from switching to a knife when the time comes. Using a knife gives you a lot more control and is well worth learning. 

2. Make templates. When I first started leather working I measured and marked on my leather using a ruler and no template. This is dumb on a number of levels: you’re prone to mistakes, you haven’t thought through the entire project so you’ll think of things you need too late, and any mistake you make will be on leather instead of poster board. Instead make a template on poster board and make it neat so you can use it to trace it onto the leather with a compass or something similar. All my lines and therefore cuts were much cleaner after making this simple change. 

3. Score. You should use a ruler to keep your cuts nice and straight, but sometimes rulers slip. This generally happens when you put too much force on my knife to achieve my cuts. There’s two things you can do to fix this. One is sharpening the knife (seriously go do it). The second is scoring the leather. Once I’ve traced my pattern onto my leather, I will run the knife over the lines lightly (still using my ruler to ensure a straight cut). After doing this I’ll then make my cut all the way through the leather. If your ruler does slip your knife will usually stay in the groove and prevent an expensive mistake.

4. Prevent your hand from rolling. Keeping your edges nice and flat will make beveling and burnishing that much easier. Ensure they are flat by keeping your blade perfectly perpendicular to the leather as you are cutting. This seems like common sense, yet your hand with naturally turn inward the further the cut gets away from you. Don’t over extend your arm as you cut to prevent this from happening.

5. Wet your edges. This is technically a beveling tip, but beveling is technically cutting… right? Anyways, some leather's grain (or surface), especially on soft leathers, will start to bunch as you bevel. This makes your edges look jagged instead of clean. Wetting your edges just before you begin beveling will keep the grain of the leather from puckering.

6. Rotate leather as you cut rounded corners. Cutting rounded corners can be tricky with out a punch to create a clean edge for you. If you’re using a knife, you can create smoother edges by rotating the leather as you cut the corner instead of moving your knife around the corner. If you’re right handed, push down on the leather with your left hand and turn your hand slowly and smoothly clockwise while pushing your right hand forward. If it still looks a little blocky you can always come back and sand it, but better to get it right the first time. For those of you who are sewing cloth bag linings, this same skill is used to make rounded corners.

I really hope these tips help make your cuts cleaner. If I left anything out, be sure to let me know in the comments. And I love to see some before and after pictures of your cuts!